Glitter Procreate Brush Pack: A Practical Guide for Digital Artists
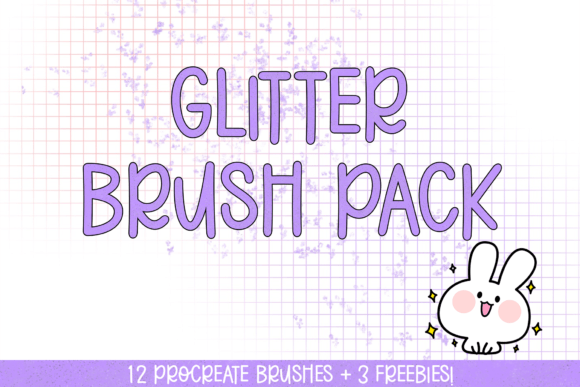
Digital art often demands a specific texture to break the sterile smoothness of vector lines or flat fills. That is where the Glitter Procreate Brush Pack becomes an essential tool in your digital kit. This collection offers 12 mesmerizing brushes designed to replicate the chaotic, light-catching nature of real-world sparkle, along with three additional freebies to expand your creative possibilities. For anyone using the Procreate app on an iPad, these tools can instantly transform a standard illustration into a dazzling masterpiece. However, simply downloading a brush set does not guarantee professional results. Understanding how to integrate these assets correctly is just as important as owning them.
Understanding What You Are Getting
Before diving into the creative process, it is crucial to understand exactly what the Glitter Procreate Brush Pack provides. The package includes two distinct .brushset files compatible exclusively with the Procreate application. These are not universal files; they will not work in Clip Studio Paint, Photoshop, or other design software without conversion, which is often difficult and rarely preserves the original texture fidelity. The pack is curated to offer a range of glitter densities, from subtle shimmer to heavy, chunky sparkles.
The inclusion of "freebies" is a common marketing tactic, but in this context, they serve a functional purpose. These extra brushes often provide complementary textures, such as foil effects or soft glows, which help blend the harsh edges of glitter into a cohesive composition. When evaluating whether this pack fits your workflow, consider if you need these specific variations or if you already possess similar assets. Redundancy can clutter your interface and slow down your creative decision-making process.
Common Mistakes When Applying Digital Glitter
One of the most frequent errors artists make when using the Glitter Procreate Brush Pack is applying it as a top layer over a finished piece without considering lighting logic. Real glitter catches light based on the angle of the source. If you scatter sparkles randomly across a shadowed area, the image loses its realism and can look like a filter was poorly applied rather than a thoughtful artistic choice.
Another overlooked detail is color management. The product description notes that colors may vary based on monitor settings. This is a critical technical nuance. A vibrant gold that looks stunning on your high-end iPad display might appear washed out or muddy on a client's screen or in print. Relying solely on your screen's default brightness and contrast can lead to disappointing final outputs. It is easy to get carried away with the visual feedback on your device, forgetting that the final audience sees a different version of your work.
Furthermore, many users attempt to use the same brush size and opacity for every element. This creates a monotonous texture that lacks depth. Professional illustrations require variation; some areas should have dense clusters of glitter, while others should have sparse, scattered specks. Using a single setting for the entire canvas makes the artwork feel flat and artificial, undermining the effort put into the rest of the illustration.
How These Errors Impact Your Work
When you ignore lighting logic or color calibration, the result is often a piece that feels disjointed. In a commercial context, such as creating assets for a brand or a book cover, this lack of cohesion can signal amateurism. Clients expect consistency and attention to detail. If the glitter looks pasted on rather than integrated, it distracts from the main subject and lowers the perceived value of the project.
Efficiency is also compromised when you do not understand the brush settings. Struggling to manually adjust flow and pressure sensitivity for every stroke slows down your workflow. Instead of focusing on composition and storytelling, you spend time fighting with the tool to get a basic effect right. This frustration can stifle creativity and lead to burnout, especially for freelancers working under tight deadlines.
Better Approaches for Professional Results
To avoid these pitfalls, start by treating the Glitter Procreate Brush Pack as part of a larger lighting system, not a standalone decoration. Create a dedicated layer for your highlights and use the brushes only where light would naturally hit the surface. Use blending modes like "Add," "Overlay," or "Screen" to integrate the texture more organically with the underlying colors. This technique mimics the way light reflects off physical particles, creating a much more convincing illusion of depth.
Regarding color, always check your work on multiple devices if possible. Export a test image and view it on a phone, a laptop, and a tablet. Adjust the saturation and brightness of your glitter layers until they hold up across different screens. Do not assume your monitor is the final arbiter of color accuracy. If you are preparing work for print, convert your file to CMYK early in the process to see how the vibrant RGB colors of the glitter translate to ink.
Variety is key to avoiding a repetitive look. Take advantage of the 12 different brushes included in the pack. Assign different brushes to different parts of your design. Use a fine, dust-like brush for background ambiance and a heavier, chunkier brush for focal points. Experiment with the pressure sensitivity settings within Procreate so that pressing harder deposits more glitter, allowing for dynamic control over density. This approach gives you the ability to paint with light rather than just stamping a texture.
What to Check Before Downloading and Buying
Before committing to the purchase or download of the Glitter Procreate Brush Pack, verify your current software version. While most modern Procreate updates support new brush formats, older versions of the app may struggle with complex brush engines, leading to crashes or missing textures. Ensure your iPadOS and Procreate app are updated to the latest stable release before importing any new .brushset files.
Also, consider your storage space. High-quality brush sets with embedded texture maps can take up significant space on your device. If you are working on an older iPad with limited storage, adding large asset packs might force you to delete other essential apps or photos. Plan your digital workspace accordingly.
Finally, review the license terms associated with the pack. Most personal-use licenses allow you to use the brushes in your own artwork, but commercial usage—such as selling stickers, prints, or using the art for client logos—may require a different agreement. Misunderstanding these terms can lead to legal complications or the removal of your content from marketplaces. Always read the documentation provided with the download to ensure your intended use is covered.
Integrating the Pack Into Your Workflow
Once you have avoided the common traps and verified your setup, integrating the Glitter Procreate Brush Pack should be a seamless enhancement to your art. Start by creating a small test swatch. Try different blending modes and opacity levels to find the sweet spot for your specific style. Save these custom configurations as your own presets within the pack to speed up future projects.
Remember that the goal of these tools is to elevate your vision, not to replace your artistic judgment. The best digital artists use resources like this to solve problems and add flair, but they never let the tool dictate the outcome. By approaching the Glitter Procreate Brush Pack with a strategic mindset, checking your color profiles, and respecting the physics of light, you can create work that truly shines. Whether you are a hobbyist exploring new textures or a professional delivering high-stakes designs, the difference between a good piece and a great one often lies in these subtle, practical details.